Monday, November 25, 2013

Christmas Cookbook Treats 2013 by Chef Bari


Christmas Cookbook


Chef Bari is busy in the kitchen preparing for his 2013 Christmas Cookbook. Join Chef Bari on Christmas Cookbook for recipes and tips on making sweets treats cookies and Nanaimo Bars - all on his Facebook page Christmas Cookbook

Step to Step Photos with recipes instructions on how to prepare your favourite Christmas Holiday Treats, such as Triple Layer Yummy Bars

Christmas Triple Layer Yummy Bars by Chef Bari


Friday, October 25, 2013

Christmas Treats and Sweets by Chef Bari

Thanks for dropping by for Christmas Treats and Sweets


At Bellagio Las Vegas by Canadian Recipes of the Great White North

Welcome to Christmas Treats and Sweets with Chef Bari. Enjoy your Christmas Season with my cookies and treats recipes.

UPDATE: 2013 - Join Me on my Facebook Page : Christmas Cookbook for new recipes and great step by step photos.

Gingerbread Men or Women Cookies


Ingredients:

• 3 cups flour
• ¼ teaspoon salt
• ¾ teaspoon baking soda
• 2 teaspoons ground ginger
• 1 teaspoon cinnamon
• ¼ teaspoon nutmeg
• ½ cup(114grams) butter – room temp.
• ½ cup (110 grams) sugar
• 1 large egg or 2 small eggs
• 2/3cup(175ml) molasses


Method:

  1. In a large bowl, sift together the flour, salt, baking soda, and spices. Set aside.
  2. In the bowl of your favourite mixer (or by hand), with the paddle attachment, cream the butter and sugar until light and fluffy. Add the egg and molasses and beat until well combined. Gradually add the flour mixture beating until mixed.
  3. Divide the dough in half, and wrap each half in saran wrap and refrigerate for at two hours or better yet - overnight. 
  4. Preheat oven to 350 degrees F (177 degrees C) and place rack in center of oven. Line 2 baking sheets with parchment paper and set aside while you roll out the dough. I just use “Pan” spray instead of parchment paper – but – if you are not experience in baking use parchment paper.
  5. On a lightly floured surface, roll out the dough to a thickness of about 1/4 inch. Use a gingerbread cutter to cut out the cookies. 
  6. With a metal long offset spatula (place in hot water first) lift the cut out cookies onto the baking sheet, placing the cookies about 1 inch (2.54 cm) apart. 
  7. Make holes with at the top of cookies if you love to hang your cookies on the Christmas Tree or for placing a red or green ribbon when making it as a gift. Bake for about 8 - 12 minutes depending on the size of the cookies.
  8. Check your cookies in ten minutes (depending on the size of your cut-outs – they may cook faster when smaller. Don’t overcook - the edges are just beginning to brown. 
Remove the cookies from the oven and let firm before moving – approximately five minutes to rest.


Check out Chef Bari 

Christmas Treats Series with Canadian Recipes of the Great White North

Once again, Welcome to Christmas Treats and Sweets with Canadian Recipes of the Great White North. Enjoy your Christmas  Season with my cookies and treats recipes on my Christmas Cookbook on Facebook with new recipes and step by step photos.

MERRY CHRISTMAS

http://www.facebook.com/Christmascookbook
Christmas at Caesars Palace in Las Vegas by Canadian Recipes of the Great White North 


Christmas Cake


Christmas Cake by Chef Bari


Ingredients:
• 1 cup of brown sugar
• 1 cup hot water
• ¼ cup butter
• 1 teaspoon cinnamon
• ½ teaspoon ground cloves
• 1 teaspoon ground ginger
• ½ teaspoon salt
• 2 cups raisins
• 2 large eggs
• 1 ½ cup white flour
• 1 teaspoon baking soda
• 1 teaspoon vanilla
• 1 cup candied chopped mixed peel fruit

Directions or Method:


  1. Spray bottom and sides with “Pan” Spray – use a 9 x 5 x 3 cake pan. Preheat oven to 350 degrees F (177 degrees C)
  2. In a large saucepan, over medium heat, bring to a boil the sugar, water, butter, spices, and raisins. 
  3. Boil for five minutes remove and let cool till lukewarm. Stir into this mixture the lightly beaten eggs, flour, baking soda, vanilla and candied fruit. 
  4. Pour into the prepared pan and bake for 45 - 60 minutes or until a toothpick inserted into the center of the cake comes out clean. Remove from oven and let cool on a wire rack. Cover and store, if possible, for a few days before serving.
Makes one - 9x5 inch loaf


Canadian Recipes of the Great White North makes a Great Christmas Gift :


Christmas Treats Series with Canadian Recipes of the Great White North

Christmas is a wonderful time of the year to be close with your family and enjoy Christmas Treats by Canadian Recipes of the Great White North.

Join Us - Canadian Recipes of the Great White North and Christmas Cookbook on Facebook

Christmas Treats and Sweets


http://www.facebook.com/Christmascookbook

Join me with wonderful recipes that will help make your Christmas a very special season of the year with your family.
Treats and sweets always make a great gift during the Christmas Season

MERRY CHRISTMAS 2013

Christmas Shortbread Cookies


Ingredients:
  • 2 cups (260 grams) all-purpose flour 
  • 1/4 teaspoon (2 grams) salt 
  • 1 cup (250 grams) unsalted butter, room temperature 
  • 1/2 cup (60 grams) icing sugar 
  • 1 teaspoon (4 grams) pure vanilla 

Method: (Makes about 20 shortbread cookies)


  1.  Using your favorite mixer (or by hand), cream the butter until smooth (approximately 1 minute). 
  2. Add the sugar and beat until smooth 
  3. Beat in the vanilla extract. 
  4. Stir in the flour mixture just until mixed. 
  5. Flatten the dough into a disk shape, wrap in plastic wrap, and chill the dough for at least an hour. 

Preheat oven to 350 degrees F (177 degrees C) with the rack in the middle of the oven. Line two baking sheets with parchment paper.

On a lightly floured surface roll out the dough to 1/4 inch (.5 cm) thick.
Cut into rounds or whatever shapes you wish using lightly floured cookie cutter.
Place the cookies on the prepared baking sheet and place in the refrigerator for about 15 minutes.
This will firm up the dough so the cookies will maintain their shape when baked. Bake for 8 - 10 minutes, or until cookies are lightly brown. Cool on rack.

Shortbread with keep in an airtight container for about a week or frozen for several months and they make a great Christmas Gift for all. Makes about 20 shortbread cookies
Enjoy!
Merry Christmas 


Make Turkey Stuffing by Chef Bari

How to Make Banquet Roll Stuffing by Canadian Recipes of the Great White North

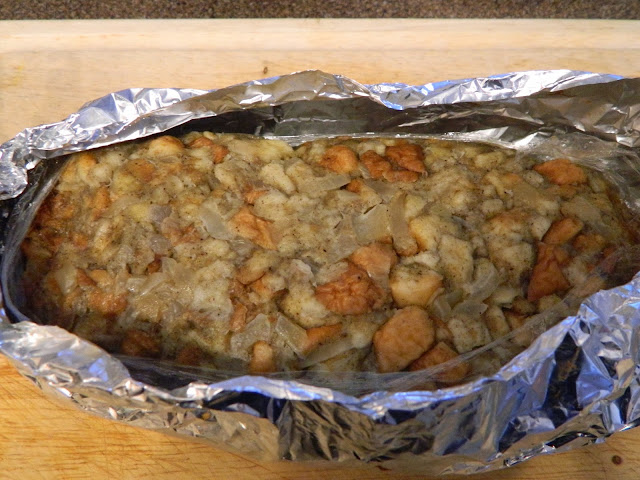
Chefs across North America use this well-known procedure in making turkey stuffing for Thanksgiving and Christmas Banquets. Bari has a smaller version that you can make in your home for family and friends. With this recipe I like rolling up with bacon...what a tasty treat.


Turkey Stuffing Roll Baked in the Oven by Chef Bari
Stuffing Roll by Chef Bari 


Preheated Oven : 350 degree F

Ingredients:

  • 1 Loaf of Bread (cut into cubes)
  • 1/2 sweet white onion finely diced
  • 2 Whole Eggs
  • 3 teaspoons of Powder Sage
  • 1 teaspoon of salt
  • 1 teaspoon of black pepper
  • 1/2 cup of chicken stock 
  • 1 teaspoon of Poultry seasoning

Optional:

  • 2 teaspoon of Chicken base 
  • 1/2 cup of cooked diced giblets
  • 1/4 cup of melted butter
  • 1/2 pound of bacon ( you can wrap  stuffing with bacon - very tasty)


Method:

  1. Get a loaf of bread ( your choice - white, brown or whole wheat)
  2. Cut the bread into small cubes and place in a large mixing bowl.
  3. Saute onions and add to mixing bowl
  4. Add two whole eggs
  5. Add seasonings: 3 teaspoons of powder Sage, 1 teaspoon of salt. 2 teaspoons of black pepper and 1 teaspoon of Poultry seasoning
  6. Add 1/2 cup of chicken stock ( place in microwave for 30 seconds) 


Turkey stuffing roll baked in the Oven by Chef Bari
Turkey Stuffing Roll - Baked in the Oven by Chef Bari           http://chefbari.com/


Optional: (RECOMMENDED)
  1. Add 2 teaspoons of chicken base and 1/2 cup of cooked diced giblets or cooked turkey pieces
  2. The chicken base helps to add a nice flavor to your stuffing.
  3. Add 1/4 cup of melted butter
  4. Mix all the ingredients within the mixing bowl by hand


Here's the fun part:

  1. Take 12 inches or more of Aluminum wrap and lay it out flat on your table. 
  2. Now - take saran wrap - 10 inches and place it flat within the Aluminum wrap. 
  3. Take your mixture of stuffing and place it out evening within the saran wrap. Form it into a long roll - up to ten inches long. Wrap the saran wrap within the long roll and tighten the ends by rolling the saran wrap in a twist.
  4. (Optional): Wrap with bacon throughout the stuffing roll
  5. Tie the ends with extra saran wrap - both ends.
  6. You should have a long roll of stuffing.
  7. Now - roll within the Aluminum wrap and place on a baking sheet. Poke the roll with holes using a fork. Just shallow pokes along the roll.
  8. Place the baking sheet of rolled stuffing into your pre-heated oven of 350F and let cook for 45 minutes or 30 minutes if wrapped with bacon.
  9. Note: If you wrapped with bacon - remove aluminum wrap and let cook for another 15 minutes until bacon is crispy - oh what a treat you will taste :) 
  10. Bring out and let cool for 15- 20 minutes. Open up and cut into thick slices. You can either place around your plate of turkey or have it's own plate of sliced round pieces of stuffing.

Congratulations!
You have just learned how to cook stuffing just like we do in large restaurants or banquets. This procedure is very common practice within the hospitality industry. Very rare will we cook stuffing within the cavity of a turkey.


HOW TO COOK A TURKEY BY CHEF BARI

 Please support Chef Bari by Purchasing his Cookbook : 


Merry Christmas Treats by Chef Bari

MERRY CHRISTMAS 

Christmas is a wonderful time of the year to be close with your family and enjoy Christmas Treats by Canadian Recipes of the Great White North on Facebook. 
Canadian Recipes of the Great White North have over 4500 visitors a year. Lets see if we can reach 10,000 a year. Join Us on Facebook : Canadian Recipes of the Great White North - Merry Christmas!
Now until Christmas I will be making Christmas Cookies and Treats - I like to call it :

Christmas in Las Vegas - Vegas Reviews

Christmas Treats and Sweets


Christmas Chew Cookies by Canadian Recipes of the Great White North

Ingredients:
• 1 cup butter
• 1 cup brown sugar
• ¼ cup molasses
• 2 Large Eggs or 3 small Eggs
• ½ tsp vanilla
• 2 ¾ cups flour
• 2 tsp cinnamon

• 2 tsp baking soda
• ¼ salt


Method:
1. Cream butter & brown sugar in your favourite mixer.
2. Adding Liquid Items – mix in one egg at a time, add molasses and vanilla. Just be sure it is mixed.
3. Using a separate bowl, mix together the flour, baking soda, salt and cinnamon by hand. (Tip: Using your hands incorporates the dry products more evenly)
4. Combine with wet items in mixer. Add the flour mixture a cup at a time
5. Place batter in fridge for a couple of hours
6. Pre-heat the oven at 350 degrees F
7. Take batter out of the fridge – There are two ways of preparing the cookies. You can either place the batter in saran wrap and make a roll for easy cutting Or if you’re in a hurry, take some batter into the palm of your hands and make small balls.
8. If you like – you can roll the balls in sugar ( for that extra sweet tooth)
9. Place on baking sheets of your choice, pressing the ball down with the palm of your hand or you can use a fork to press it down.
10. Bake for ten minutes – Should be soft in the center but firm.

Merry Christmas! Check out Chef Bari Website


Gingerbread Men or Women Cookies   Christmas Cake Recipe   Christmas Shortbread Cookies

Check out my cookbook - Canadian Recipes of the Great White North  makes a Great Christmas Gift - Check it out 

 About Chef Bari

Merry Christmas Treats by Chef Bari

Thanks for dropping by for Christmas Treats and Sweets. 2013


Caesars Palace Christmas Time in Las Vegas by Canadian Recipes of the Great White North
Caesars Palace Las Vegas during Christmas 

Christmas Chocolate Truffles  by Canadian Recipes of the Great White North


Ingredients:

• 8 oz(225grams) semisweet chocolate chips
• 3/4cup(175grams) 45% whipping cream
• 2 tablespoons (30grams) butter
• 2 tablespoons Grand Marnier or Kahlua

Method:

  1. Place chocolate chips in a medium sized stainless steel bowl. Set aside. 
  2. Heat the cream and butter in the microwave for one and half minutes ( careful to watch that your liquids do not expand – in turn making a great big mess)
  3. Quickly and with caution remove the cream mixture from the microwave and pour over the chocolate chips. Let rest for five minutes.
  4. Now – Add your Grand Marnier or Kahlua.
  5. Stir with a metal whisk until mixed.
  6. Cover and place in the refrigerator until the truffle mixture is firm (this should be overnight)

Truffles by Canadian Recipes of the Great White North


Set Up Coatings for Truffles:


  1. Set up in small dishes such as your cereal bowls - Cocoa Powder, Icing Sugar, chopped nuts of your choice, toasted coconut and shaved chocolate.
  2. Take out the truffle mixture from the refrigerator. 
  3. Tip: Run your hands under cold water ( cold hands are better to work with – the warmth of your hands melts the chocolate otherwise) You don’t have to – but a very good tip With your hands form the chocolate into round bite-sized balls. 
  4. Quickly roll the truffle in the coating and place on a parchment lined baking sheet. 
  5. Cover and place in the refrigerator until firm. Truffles can be refrigerated for a couple of weeks or else frozen for a couple of months. Bring to room temperature before serving.
Makes 30 small truffles.

Gingerbread Men or Women Cookies   Christmas Cake    Christmas Shortbread Cookies


Canadian Recipes of the Great White North  makes a Great Christmas Gift - Check it out   

About Chef Bari

Christmas Treats and Sweets

Thanks for dropping by for Christmas Treats and Sweets


Christmas Treats by Canadian Recipes of the Great White North - Photo while at Rimrock Hotel Resort in Banff Alberta


Welcome to Christmas Treats and Sweets with Chef Bari. Enjoy Christmas 2013 season with my cookies and treats recipes.

Join Us - Canadian Recipes of the Great White North on Facebook

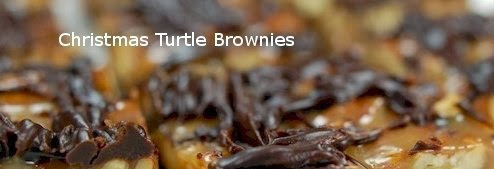
Turtles...Turtles...Turtles...Brownies by Canadian Recipes of the Great White North

Ingredients:
• 3 oz (90grams)unsweetened chocolate – coarsely chopped
• ¼ cup (180grams) butter (cut into small pieces (Tip : use cold hands – run under cold water)
• 3 large eggs or 4 small eggs
• ½ cup (110grams) brown sugar
• 1 cup (225grams) white sugar
• 1 ½ teaspoons of vanilla
• ½ cup plus 2 tablespoons (80grams)flour
• ¼ teaspoon salt
• Caramel Topping:
• 40 Kraft Caramels
• ½ cup (150ml) heavy whipping cream
• 2 cups(300 grams) pecan halves - toasted

Directions:
Gouache Topping:
2 ounces (65grams) semisweet chocolate, coarsely chopped
1/4 cup (75 ml) heavy whipping cream


Chocolate Turtle Brownies by Canadian Recipes of the Great White North


Method:


  1. Preheat oven to 350 degrees F (177 degrees C) and place rack in the center of the oven. Butter, or spray with a non stick spray, a 9 x 13 inch (23 x 33 cm) rectangular baking pan. 


Brownies:

  1. Melt the chopped chocolate and butter in a stainless steel bowl placed over a saucepan of simmering water. Remove from heat and set aside while you make the brownie batter.
  2. Using your favourite mixer beat the eggs and sugars until smooth. Beat in the vanilla and then the melted chocolate mixture. Make sure to scrape down the sides of the bowl and, on low speed, beat in the flour and salt.
  3. Pour into the prepared pan and bake for about 20 minutes, or just until the brownies are barely firm to the touch. Remove from oven and place on a wire rack. 

Caramel:

 Place the unwrapped caramels and cream in a saucepan and melt, over low heat (stirring frequently), until smooth.
Remove from heat and stir in the toasted pecans, making sure all the pecans are coated with caramel. Spread the caramel topping evenly over the still warm brownies and let cool to room temperature. Then cover and refrigerate brownies for about an hour or until the brownies are firm. 


Gouache: 


Place the chopped chocolate in a heatproof bowl. Heat the cream in a small saucepan over medium heat (alternatively, heat the cream in the microwave). Bring just to a boil. Immediately pour the boiling cream over the chocolate and allow standing for 5 minutes. Stir with a whisk until smooth. 

Remove the brownies from the fridge and, using a fork, drizzle the Gouache over the brownies in a zigzag pattern. Cover and refrigerate until the chocolate is set. Using a sharp knife, cut the brownies into 48 bars.


Store, covered, in the fridge for 10 days, or in the freezer for longer storage. Makes a perfect gift to anyone of your friends or family.
Just place it in a lined decorative box that you can buy from any card store or Michael's Art Store. Gets some ribbons and bows – and your set to send it as a wonderful gift that everyone appreciates today.


Why would they appreciate it? Not very many people cook these days – they rather buy it – that makes it a special gift just from you.
Makes about 50 brownies.


Canadian Recipes of the Great White North makes a Great Christmas Gift - Check it out

http://chefbari.com/

Thursday, September 26, 2013

Banana Loaf by Canadian Recipes of the Great White North

Banana Loaf by Canadian Recipes of the Great White North


http://www.facebook.com/Christmascookbook
Banana Loaf by Chef Bari 


Join Us - Canadian Recipes of the Great White North on Facebook.


Preheat oven at 350 degrees F and spray Two Loaf Pans ( 9x5x3)

Ingredients:
http://www.facebook.com/canadianrecipes
Mixed Batter of Banana Loaf by Chef Bari

  • 1/2 cup of butter
  • 1/2 cup of  brown sugar
  • 1/2 cup of white sugar
  • 2 large eggs
  • 2 1/3 cups of ripe bananas ( mash with fork until well mashed)
  • 1 teaspoon of baking soda
  • 1/2 teaspoon of salt
  • 1 teaspoon Cinnamon 
  • 2 cups of all purpose flour
Cream Butter and Sugar

Method:
  1. Set-up mixer - I have always used a Bosch  Mixer.   Add the dry ingredients together in a medium bowl : flour, baking soda, cinnamon and salt.
  2. Cream butter and sugar together. Stop and scrap down sides and continue. See photo of what your product should look like. 
  3. While mixer is running, add one egg at a time until mixed; repeat again with second egg.
  4. Add mashed banana's and again mix well. Stop machine and scrap down bowl. Continue
  5. Add Flour Mixture from bowl - one cup at a time.
  6. Place banana batter into two loaf pans ( already sprayed with Pam)  and place in oven for 45 - 50  minutes. ( depending on your oven - use the toothpick test method - insert toothpick and it should come out reasonably dry)   
  7. Bring out of oven and let set for five to ten minutes. Remove from pan and let rest (cool off) Remove my pans and let sit for ten minutes. Cut a couple of slices with a slab of butter - enjoy!
Enjoy more treats and sweets recipes on my social Facebook Page : Christmas Cookbook

Mashed Bananas


Batter Banana Loaf ready for oven
I have many variations and photos of my Banana Bread - see for yourself on my Christmas Cookbook Page on Facebook.


Friday, September 20, 2013

10 Easy-Steps To Prime Rib Dinner by Canadian Recipes of the Great White North


10 Easy Steps to Making a Prime Rib Dinner by Canadian Recipes of the Great White North


Making Prime Rib for a Dinner Party can sound like a lot of work, but if you take these 10 easy steps, you will be hosting one of the best meals in North America with your friends and family.


Join Us - Facebook :Canadian Recipes of the Great White North - LIKE US


 The menu plan is Prime Rib, Roast Potatoes and Root Vegetables by Chef Bari 


Prime Rib Dinner


  1. First –  ( The Day Before) Grocery List : 6 lb Prime Rib Roast ( 3 -4 ribs) / Red Potatoes / Carrots, turnips, white onion.( Alberta Beef is the best in the world – you can find the best choice and price meats at Costco in North America Alberta Beef is even shipped to Japan and rated number one in the world.)
  2. Pre- heat oven to 350F.
  3. Preparing Prime Rib or Roast Beef : Take a medium to large roasting pan that you would normally use for cooking Turkey.Add the Prime Rib to the roasting pan bone side down placing on top of a metal grate. ( If you don’t have a metal grate, you can do what we do in the hotels - we have always used tin foil. Make the tin foil into a two rings that will cover the bottom of your pan.) Place the Prime Rib evenly on top of the tin foil rings. Reason? So your Prime Rib will stay above the juices so it will not boil. Another term for Roasting is “Dry Heat Cooking Method”.
  4. Season your Prime Rib or Roast with Rosemary, Salt, Black Pepper and Garlic Powder or Garlic Salt. You can also buy the fresh herbs if you like.Rub in the seasoning and herbs into the Prime Rib
  5. Place into the oven and cook Prime Rib beef for about 1 1/2 to 2 hours for medium-rare (approx.15 – 20 minutes per pound).Check the internal temperature of the roast in several places with an instant-read thermometer; it should register 140 degrees F for medium-rare. Let rest for 15 minutes before serving - very important!  This way, your Prime Rib will remain juicy. 
  6. One hour before the Prime Rib or Roast is ready – have pre-cut root vegetables (such as Carrots, turnips, onions and celery) medium rough cut. Place around the roast. Again – do not cover pan.
  7. When the Prime Rib Roast is ready, take out and let rest for 15-20 minutes on a cutting board.
  8. How to make Roast Potatoes: You also pre-heat oven at 350F – if you are cooking with a Roast – place into oven one hour before roast is ready.
  9. Take some red skin potatoes and cut into fours. When deciding how many do you cook Chef’s use a formal (that is another topic) or you can say 1 1/2 potatoes per person.Ingredients: Olive Oil – 1/4 cup, 1 tablespoon of Paprika, 1 teaspoon of Garlic powder, 1 teaspoon of salt and white pepper (use black pepper if you like) Mix all together in medium bowl.Add your quartered potatoes to this mixture. Mix with clean washed hands – well mixed.
  10. Place on a baking sheet and place in the preheated oven for one hour. 

Roast Potatoes

And there you have it - 10 Easy Steps to Prime Rib Dinner by Canadian Recipes of the Great White North

Check out more photos on Facebook : Canadian Recipes of the Great White North
Check out Chef Bari Website: http://chefbari.com/


Saturday, August 24, 2013

Tequila Lime Chicken Carbonara Fettuccine

This Recipe comes (with permission) from Chef Bari’s second edition of Canadian Recipes of the Great White North.
Yield: 4 servings
Tequila Lime Chicken Carbonara Fettuccine

Ingredients

¼ cup / 50 ml olive oil

4 piece of Bacon cut into medium cut

1 cup / 250 ml mushrooms

1/2 cup of White Sweet Onions

1/4 cup of Green Onions

½ cup / 125 ml red peppers, julienne (optional)

1 tsp / 5 ml garlic, minced

6 oz / 170 g raw chicken breast, cubed

1 oz / 30 g tequila

½ fresh lime

2 cups / 500 ml 33% whipping cream

4 cups / 1 liter cooked fettuccine


 Canadian Recipes of The Great White North

Method:

Take out your favorite deep sautĂ© pan and set it on top of the stove. Cook off your bacon first - not crispy - just cooked. Take bacon off and place on paper towel. Remove any bacon fat from pan.  Place Bacon back into pan.

 Add the olive oil and turn heat to medium heat. Add sliced fresh mushrooms and white onions. Saute' for a couple of minutes. 

Add the raw cubed chicken breast and let cook for five minutes, stirring mixture off and on. You can add the chopped green onions now if you wish - or wait until the last step.

Take the pan off the burner and flambé with tequila. Return to stove and squeeze lime juice into the pan. Add the whipping cream and parmesan
cheese.
Add optional chopped julienne red peppers ( thin strips)

Add  cooked fettuccine to the pan, lower the heat to a simmer and let cook until it begins to pull away from the pan. Arrange fettuccine dish in your favorite pasta bowl and enjoy. Goes great with fresh garlic and soya butter on toasted panini bread! (Another Recipe)


Compliments of Chef Bari Demers,

Copyright 2013 Bari Demers.

All rights reserved. No part of this publication may be reproduced, stored in a retrieval system, or transmitted, in any form or by any means, electronic, mechanical, photocopying, recording, or otherwise, without the written prior permission of the author.

Published 2003 by Chef Bari - Chef Bari:

Division in conjunction with Trafford Publishing.

Second Edition 2007

Thursday, May 30, 2013

Filet Mignon Fruit de Mer by Chef Bari

Filet Mignon Fruit de Mer by Canadian Recipes of the Great White North  is simply the french version of : scallops, jumbo shrimp and preferably lobster but can use Alaskan king crab...

Join Us - Facebook :Canadian Recipes of the Great White North - LIKE US

Ingredients:
4 cuts of : 4 oz Filet Mignon
3/4 cup of Bay Scallops
1 cup of Jumbo Shrimp (preferably 21/25 ct)
1 cup of cooked lobster or crab meat


Bearnaise sauce:
1 cup of butter oil
1 egg
1/4 teaspoon of cayenne
1 tablespoon :Fresh Lemon Juice
1 clove of fresh minced garlic
1/2 cup of fresh sliced mushrooms
1 teaspoon of taragon saute within red wine vinegar
Salt and Pepper to taste

Filet Mignon Fruit de Mer


Method: 
Wash scallops to make sure all grit is removed. Dredge with seasoned flour or cornstarch.
Quick saute' scallops in hot olive oil or veg. oil - lightly gold color
Quick saute jumbo shrimp without peeling ( add minced garlic after the shrimp is added) Very little time - just to light pink. Remove from saute pan and let cool. Peel shrimp.
Set to the side for now - place in your fridge...


Bearnaise Sauce:

Take a medium pot of water and bring to a boil - turn down to simmer.
Get a metal bowl that will fit over your medium pot without falling into the pot. Must fit nice over the pot.
Crack an medium egg, add minced garlic, lemon juice and cayenne. Add a touch of salt and preferably white pepper. Careful with the salt - as the butter is already salty.

Take 1/2 lb of butter and melt - remove the milk solids from the top - by doing this you will have - what is called : Butter oil

Now - take the metal bowl of egg mixture and start whisking it before you place it on top of the pot of hot water.
Once mixed - bring the bowl over and place on top of the hot water and keep whipping with a whisk.
Carefully monitor your mix - do not overcook or you will have cooked egg instead. You should get a smooth light mix. Now add your butter oil in a steady smooth light stream - mixing at all time until well incorporated.
Take off and place to the side...
Take a saute' pan and add red wine vinegar and fresh chopped tarragon. Reduce until almost dry...take off and place to the side...
Remove the marinated tarragon mixture from the saute pan.
Now : Cook your steak to your liking ...
While steak is cooking...set a the saute pan on the burner and add a tablespoon of olive oil.
Add sliced fresh mushrooms and minced garlic... only saute' for a couple of minutes.
Add your seafood together into the saute' pan... only a couple of minutes.
Add the hollandaise sauce and tarragon mix .
Saute for a quick couple of minutes and add to the top of your cooked steak...
Enjoy!


Enjoying my blogs -support by buying my book : Canadian Recipes of the Great White North 

Check out Chef Bari Website : http://chefbari.com/

Easy-to-Make Cheesecake by Canadian Recipes of the Great White North


Easy to Make Light Cheesecake by Canadian Recipes of the Great White North - ( a non-bake cheesecake for a quick light dessert)


Serves 8 to 10
Ingredients :

•3/4 cup crushed graham crumbs
•1/4 cup sugar
•4 tablespoons unsalted butter, melted
•3 tablespoons freshly squeezed lemon juice
•2 envelope unflavored gelatin
•4 large egg yolks
•2 1/2 cup half & half cream or 33% whipping cream
•Pinch of salt
•Grated zest of 1/2 orange or 1/2 lemon
•1 teaspoon pure vanilla extract
•1- 250 g cream cheese, room temperature
•1/2 cup of sour cream and 1/4 cup of milk
•1/2 cup heavy cream, whipped (33%)

Lite Cheesecake by Chef Bari


 Canadian Recipes of the Great White North


Join Us - Facebook :Canadian Recipes of the Great White North - LIKE US


Directions:

1.Preheat the oven to 400 degrees. Spray springform pan with Pam or generic brand into the bottom and sides of a 7-inch springform pan.( If using a 12 inch springform pan - double recipe)

Make crust: Melt butter in microwave - 30 seconds. Place in bowl and add graham-cracker crumbs and 1/4 cup of sugar. Mix together and press into bottom of pan. Place in the oven and bake for 10 minutes.

3.Place 3 tablespoons of lemon juice in a small bowl, and sprinkle gelatin over the surface. Set aside for 10 minutes to soften

4. Beat 4 eggs yolks in a small bowl. Add 2 cups of heavy cream into saucepan - place under medium heat. Add half of warm cream and mix into the small bowl of egg yolks - stir in as you do this. Once incorporated add the egg yolk mixture back into the saucepan and stir constantly - approximately 8 -10 minutes. Make sure your heat is only on medium. You can gradually whisk in remaining 1/2 cup sugar, salt and vanilla. Cook over medium-low heat, stirring constantly, until mixture coats the back of a spoon. Do not allow to boil. Transfer bakc to the bowl.

5.Stir in softened gelatin, orange zest or lemon zest, and vanilla, mixing until gelatin is completely dissolved. Congratulations - you have just made a custard. Set aside.

6.Place the 250 grams of cream cheese, 1/2 cup of sour cream and 1/4 cup of milk into a food processor - blend until smooth. With machine running, add warm custard and process just long enough to combine. Transfer to a bowl and fold in whipped cream. Pour mixture into the prepared pan, cover, and chill overnight.

7.Release spring from pan - Unmold cake from springform pan by running a thin knife ( dip knife in hot water) around the inside of the pan. Carefully remove outside of pan. Slide onto a serving plate, and chill until ready to serve.

To the Plate:

Cut a small slice of cheesecake using a knife that has been dipped in hot water ( this gives the cheesecake an even smooth cut)
Place on your favorite serving plate.
Add a genenrous portion of blueberry or strawberry sauce or compote' (jam) just on top of the cheesecake and let some run off.
Add a dop of whipping cream on top and voila' - enjoy :)

An Easy-to-Make Light Dessert for your Dinner Party tonight.

In my book - Canadian Recipes of the Great White North  you can find a baked wild strawberry cheesecake.

Saturday, May 25, 2013

Spudnut Recipe and The Spudnut Shop in Vernon B.C.


When I was ten years old my parents decided to buy a Spudnut Shop in Vernon,B.C., Canada during the summer of 1967.

 It turns out to be the biggest experience of my life, due to the Spudnuts themselves. I had never tasted such a tasty [donuts] in my life, as these particular [donuts] were not donuts at all, but a Spudnut - a special brand of potato flour mix by a franchise that originated in Salt Lake City, Utah.


The original recipe of Spudnut come from the two brothers -where Bob and Al Pelton in Salt Lake City began the historical adventure of turning [donuts] into something better – Spudnut – a potato flour ingredient with the use of yeast, pure vegetable shortening and certain spices.

Be sure to check out a great little short story called : The Great Spudnut 


As said, the Spudnuts started with a Spudnut flour mix originated by two ingenious brothers in Salt Lake City. After months of experimentation, they came up with the prefect mix. After perfecting the Spudnut Flour Mix, just like that they became a household name in United States, growing so fast that their next solution was to start a special franchise in Salt Lake City. The brothers had grown from a small Spudnut shop to a large growing enterprise with a warehouse and mixing plant. It has been told that you could buy a Spudnut franchise in 1950’s for only $2000.00. Apparently in order to provide orders to the East of United States they decided to open up a warehouse in Cleveland Ohio. But, my mom says that their orders came directly from Salt Lake City, Utah. Once we had to buy directly from Calgary, Alberta.  I still remember that quick unexpected trip on Sunday.  Needed the potato flour for that Monday morning. 


Photo is courtesy of Eileen Podanowski.  Eileen here, in the photo is a baby at the time (1961) and her mom and dad are posing in front of the Spudnut Shop my parents owned from 1967.  Thank you Eileen for this wonderful photo.  You can see the glass window where my dad would showcase, making the Spudnuts, so everyone could watch. 


With the Spudnut Franchise, you had to order 100 lb bags of 10 [Spudnut mix]per week, which was shipped and delivered to Vancouver,B.C. or Calgary, Alberta, Canada for $75.00 per bag.

 The cost of a signal Spudnut was .010 cents each or $1.20 per dozen in 1968. My mom, Betty Watts reminded me that Long johns ( a long style Spudnut with chocolate glaze) and jelly filled Spudnuts cost a whole 0.15 cents per Spudnut. Coffee at the time was only 0.10 cents while tea was 0.15 cents. All the prices of the Spudnuts was placed on a green chalk board.  My mom would write down the daily specials and the elusive Spudnut special price.

In the small town of Vernon, the Spudnut Shop was originally owned by hard working Ernie and Betty LeClair. They placed the shop over to their daughter and husband team – Pearl and John Lehr.  
As of 1968, my mom Betty Watts was in full control of the Spudnut Shop and this is when we began our "Spudnut Adventure".  Before that, in 1967, I believe John was helping out, to make sure the Spudnut recipe was done right.  It's like handing the keys over to your son or daughter, the first solo trip with the car.  


And what an adventure! 

My mom opened the little Spudnut Shop on main street of Vernon, at 6:00 am and closed the shop around 5:00 pm.; or when the last customer decided to finish off another tasty Spudnut.  My dad would be up around 3:00 am to begin making the first patch of Spudnuts.  I believe he made 3-4 patches per day. 

Long days at six days a week, starting with making the elusive Spudnut at 3:00 am from mixing it to rolling it out, to making the round shape of the Spudnut. It was then placed in a warming rising oven [PROOFER : long rectangular oven with room for baking sheet racks and a small water base container at the bottom] at a temperature of 190 degrees F. until the Spudnuts raised twice to three times the original size. 

 I tried to help my mom the best I could at such a young age of 10 yrs old, but mostly I ended up eating the profits of fresh Spudnuts and those tasty homemade hamburgers. My mom is now in her eighties, but we still reminisce about the Spudnut Shop days.

It's my hope you will enjoy working with the recipe below. Please note: Moderate Skill Level due to the steps required. 

Spudnut Recipe: ( smaller recipe revised from my bigger patch) 


Ingredients:
1 1/2 packages of fast rising fleischmann's yeast. ( Use 2 packages if your product has past the before date. Just saying.
1/2 cup of warm water
2 1/2 cups (dry measure) white all purpose flour
1/2 cup Organic Potato Flour (organic potato flour is found in the specialty section of your supermarket)
1/2 teaspoon of salt
1/4 cup of  Crisco Shortening or butter ( butter will make it richer, but the Spudnut will be darker ) (My parent’s Spudnut franchise used Crisco Shortening and it had a lighter tone after deep frying it. ) 
1 large egg and 1 yoke ( if small eggs use two) 
1/4 cup sugar
1 cup of lukewarm milk - split half a cup of milk in order to alternate from the dry ingredients to the wet ingredients, respectively 


METHOD/DIRECTIONS

STEP ONE:

1. Sift dry ingredients together in a medium bowl, add salt too - mix in.

2 . Mix Yeast Fleischmann's Yeast into half cup of warm water.

3. Place butter in mixer and mix. Add sugar and mix until a fluffy cream mixture. Add egg with yoke.

4. Mix in warm water and yeast mixture. 

5. Add only half a cup of the lukewarm milk until.   ( Change over to dough hook )

6. Now add dry ingredients ( white flour and Potato flour) - Add in thirds at a time.

7. Incorporate with the last of the milk ( 1/2 cup) and the dry ingredients until all incorporated together.

8. Blend for 3 - 5 minutes. 

Your finish dough product should be like Bread dough. 

STEP TWO: 

1. Remove dough from mixer and place onto floured surface. Roll into a large ball. Lightly oil ball with canola oil. 
2. Place into a lightly oiled bowl,and cover with dry cloth. Place in  a warm spot. 
3. Let rise for 1 hour or longer in warm place. ( It should double in size.) 

STEP THREE : 

1. Place dough on floured surface. 
2. Begin rolling out the dough.  You can flip it again to get traction on surface. ( 1/4 to 1/2 inch thick) 
3. Cut into round donut shapes with cutter.
5. Pace on baking sheet and COVER with dry cloth and let it rise again for 30 minutes in  warm area.

BELOW PHOTO:  The photo shows us cutting into formed Spudnuts


STEP FOUR: 

First : Make a sugar glacé : 2 cups of icing sugar with 1/3 cup of cold milk.

Second:   Get your fryer ready to go -375 degrees F or 185 degrees Celsius.   

Third : Drop 3 Spudnuts into deep fryer. Cook until light golden brown. Flip over to cook the remaining side. 

Remove and place on paper towels.  Dip into sugar  glacĂ© ( I like dividing it up evenly and add chocolate syrup to one. Just to switch it up, plus I love chocolate) 

Voila - Enjoy! 

 I love the new Cool Touch Fryers from Costco - $145 for one of these babies .


You can add sugar cinnamon mixture to the Spudnuts or use my Icing Sugar Glaze.  See Recipe below.

Making Spudnuts is a moderate level of experience. Don't attempt this if you've have never cooked before. 
Please support my efforts by purchasing my Cookbook : Canadian Recipes of the Great White North.

Check out my website Chef Bari for recipes and  my Facebook page: Canadian Recipes of the Great White North    

Additional Update Sept 2019

Good Monday Morning everyone.  Throughout the internet we have a collection of Spudnut Clone Recipes  with their spin on the recipe. If you would like to participate and have a reciprocal link to each of our websites - I would be happy to add on.


Better Batter


This morning I would like to introduce NAOMI from BETTER BATTER : Naomi has graciously credited me for the original Spudnut Recipe, as well as, added the link to my website. She has also prepared a Spudnut Clone Recipe - Be sure to checkout her recipe and recipes as well.

Thank you Naomi for participating and sharing links with each others website. Much appreciated. 

Be a part of the Spudnut group by sharing your clone too! I love to see your version. 

In the next week I'm going to add new photos and a video showing step by step instructions on making the original Spudnut Recipe. Please stayed tuned. It might take 10 days to get organized, as we Chefs are pretty busy. 

STAY TUNED !

Chef Bari


Addition Update :

It's was a blessing to be contacted by Deb Anderson, the daughter of the original owners Al Pelton. Thank you for contacting me. 

Chef Bari 
Feb 2015 

P.S. I hope everyone is using Potato flour and not starch - VERY IMPORTANT 

Please take a minute to support my efforts by buying my published cookbook - Canadian Recipes of the Great White North - CLICK ON PHOTO below.

UPDATE : 2016 -  Unfortunately my mom passed away after her fight with cancer on June 2015.  Loved by all throughout BC and Alberta.  She so loved Vernon, BC.  Her last days were with her family and friends, including three grandchildren.  She use to attend the BC Hydro social meetings with her friends, I believe every month.  Her last year's with second husband, Peter Watts, was said to be the golden years of her life.  I'll will sure miss my mom. RIP. Love Bari 


UPDATE : 2020 - Join me in my new website chefbari - more recipes, treats, sweets, home cooking, chicken dishes, beef dishes, healthy WW dishes and much much more.  


Sugar Glaze: 

Ingredients: 
1  1/2 cups of Icing Sugar
2 Tbsp Milk

Method: 
Mix together - Add more milk to make runner if required - but this works for me.